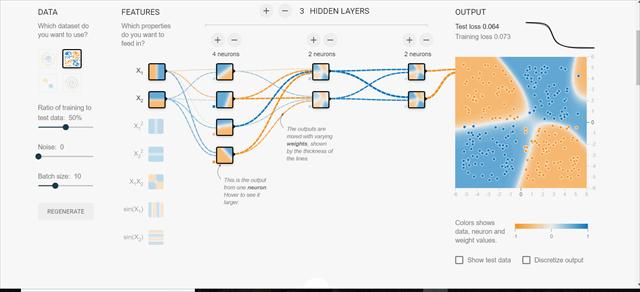
 很多的数据经过很多的操作从输入到输出完成一个flow的过程,就像水流一样连接每一个管道完成每一个运算。
device
with tf.device(“cpu”)
a=tf.constant(1)
with tf.device(“gpe”)
b=tf.range(4)
#可以判断tensor a和b分别在哪一个设备上
a.device #返回:device:CPU:0
b.device #返回:device:GPU:0
如果需要将tensor在CPU和GPU之间相互转移,操作如下:
aa=a.gpu()
aa.device #此时返回为:device:GPU:0
bb=b.gpu()
bb.device #此时返回为:device:CPU:0
1.6.V2.0常用的属性(numpy,ndim)
numpy:支持tensor类型直接转换成np.array。
b.numpy()
array([0,1,2,3],dtype=int32)
#直接指定要转换的数据类型
int(a) #可以直接转换成int,但前提是,a必须是一个scalar
float(a)
查看维度的属性有:b.ndim #返回数据维度
b.shape
tf.rank(b)
1.7.V2.0常用的属性(判断tensor)
判断是否是tensor
a=tf.constant([1.])
b=tf.constant([true,False])
c=tf.constant(‘hello,world’)
d=np.arange(4)
#判断是否是tensor
tf.is_tensor(b) #return True
isinstance(a,tf.Tensor) #return True
tf.is_tensor(d) #return False
查看数据类型
a.dtype,b.dtype c.dtype
return (tf.float32,tf.bool,tf.string)
a.dtype =tf.float32 #return True
b.dtype=tf..string #return True
1.8.V2.0常用的属性(数据转换)
convert
a=np.arrange(5) #array([0,1,2,3,4,5])
a.dtype
dtype(‘int64’) #numpy中自动生成int64
#np.array转换成tensor,且需要指定数据类型为inte32
aa=tf.convert_to_tensor(a,dtype=tf.int32)
cast:同样可以实现数据转换,且更简洁,只需要指定dtype。
tf.cast(aa,dtype=tf.float32) #指定转换成float32
<tf.Tensor:id=23,shape=(5,),dtype=float32,numpy=array([0.,1.,2.,3.,4.],dtype=float32)>
aaa=tf.cast(aa,dtype=tf.double) #指定转换成float64
<tf.Tensor:id=27,shape=(5,),dtype=float64,numpy=array([0.,1.,2.,3.,4.])>
tf.cast(aaa,dtype=tf.int32)
<tf.Tensor:id=28,shape=(5,),dtype=int32,numpy=array([0,1,2,3,4],dtype=int32)>
cast:整型和布尔型之间的转换
b=tf.constant([0,1]) #int32的整型
tf.cast(b,dtype=tf.bool)
<tf.Tensor:id=31,shape=(2,),dtype=bool,numpy=array([False,True])>
bb=tf.cast(b,dtype=tf.bool) #布尔型
tf.cast(bb,dtype=tf.int32) #布尔型转换成整型
#False对应0,True对应1
<tf.Tensor:id=34,shape=(2,),dtype=int32,numpy=array([0,1],dtype=int32)>
Variable:可求导的属性(专门为神经网络的参数所设计的属性)
a=tf.range(5)
b=tf.Variable(a) #tensor a在进行了variable的包装之后,就具备了可求导的特性。
b.dtype #tf.int32
b.name #’Varibale:0’
iIsinstance(b,tf,tensor) #False
isinstance(b,tf.Variable) #True
tf.is_tensor(b) #True
[start:end]:
a=tf.range(10)
<tf.Tensor: numpy=array[0,1,2,3,4,5,6,7,8,9])>
a[-1:]
<tf.Tensor:id=48,shape=(1,),dtype=int32,numpy=array([9])>
a[:2]
<tf.Tensor:id=58,shape=(2,),dtype=int32,numpy=array([0,1])>
a[:-1]
<tf.Tensor:id=63,shape=(2,),dtype=int32,numpy=array([0,1,2,3,4,5,6,7,8])>
b=tf.random.normal([4,28,28,3])
b[0,: ,:,:].shape #TensorShape([28,28,3])
[start:end:stop]/[::step]
b[:,0:28:2,0:28:2,:].shape #TensorShape([4,14,14,3])
b[:,::2,::2,:].shape #TensorShape([4,14,14,3])
[::-1],‘…’: 默认为任意长的冒号
a=tf.random.normal([2,4,28,28,3])
a[0,…].shape #TensorShape([4,28,28,3])
a[…,0].shape #TensorShape([2,4,28,28])
a[1,0,…,0].shape #TensorShape([28,28])
tf.gather
data=tf.random.normal([4,35,8])
tf.gather(data,axis=0,indices=[2,3]).shape #参数分别代表:数据源、维度、对应维度的索引号
TensorShape([2,35,8])
tf.gather(data,axis=0,indices=[2,1,3,0]).shape #可以理解为抽取第一个维度的索引所对应的顺序为2,1,3,0
TensorShape([4,35,8])
4.2.转置
tf.transpose:[w,h] →[h,w]
a=tf.random.normal([4,3,2,1])
a.shape
TesorShape([4,3,2,1])
tf.transpose(a).shape
TensorShape([1,2,3,4])
指定转置的维度
#指定参数perm,可以指定转置后的维度顺序
tf.transpose(a,perm=[0,1,3,2]).shape #前两给维度保持不变,交换后两个维度的顺序
TensorShape([4,3,1,2])
4.3.增加维度
维度扩张:expand dim
a: [classes,students,classes] → [4,35,8]: 可以描述为4个班级,每个班级有35个学生,每个学生有8门课程。
增加学校的维度: [1,4,35,8]+[1,4,35,8] → [2,4,35,8]
a=tf.random.normal([4,35,8])
tf.expand_dims(a,axis=0).shape #axis参数来制定要增加维度的位置
TensorShape([1,4,35,8])
tf.expand_dims(a,axis=3).shape #等同于axis=-1
TensorShape([4,35,8,1])
4.4.减少维度
维度压缩:
squeeze dim
tf.squeeze(tf.zeros([1,2,1,1,3])).shape #默认将维度唯一的维度压缩
TensorShape([2,3])
通过axis参数来指定要压缩的维度:
a=tf.zeros([1,2,1,3])
Tf.squeeze(a,axis=0).shape
TensorShape([2,1,3])
4.5.broadcasting(广播)
Broadcasting:本质是张量维度扩张的一个手段,指对某一个维度上重复n次但是确没有真正的复制一个数据。
扩张
没有复制数据
通过tf.broadcast_to来实现
广播的方法:
在需要的时候添加维度,且添加维度的初始size为1。
扩张初始化为1的维度大小与需要进行计算的维度大小相同。
例: [4,32,32,3]+[3],对[3]进行broadcasting,方法如下:[3]→[1,1,1,3] →[4,32,32,3]
4.5.1.广播的优势
为什么使用broadcasting:
编辑代码更加简洁:
[classes,students,scores] : +5 score
[4,32,8] + [4,32,8],通过expand的方式需要先把维度扩张到相同size, 再进行计算。
[4,32,8] + [5.0] (此处的5.0为数值,shape为8),广播的方式则是在后台自动进行扩张计算。
节省内存:不需要复制数据,不占内存。
[4,32,8] → 1024*4
[8] → 8*4
4.5.2.广播的实现
广播的实现:不需要输入tf.broadcast_to的命令,而是自动判断该操作符是否支持broadcastng,如果支持会自动进行广播并完成计算。
a=tf.random.normal([4,32,32,3])
(a+tf.random.normal([3])).shape
TensorShape([4,32,32,3])
b=tf.broadcast_to(tf.random.normal([4,1,1,1]),[4,32,32,3])
b.shape #TensorShape([4,32,32,3])
若无法复制成相同维度大小,则无法进行广播运算。
(a+tf.random.normal([1,4,1,1])).shape #第二维度因为已经给出4,而目标数据的第二个维度为32。
InvalidArgumentError: Incompatible shapes: [4,32,32,3] Vvs. [1,4,1,1]
本实验利用网上已有的北京房价数据集预测了北京的房价,实现了TensorFlow的线性回归应用。


微信扫码关注公众号
获取更多考试热门资料